CREATE SOLANA NFT STAKING FOR FREE & WITHOUT CODING
Table of Contents
If you have an NFT collection creating a Staking is a good way to reward holders while you lock their NFT, so they are not listing it.
In this post, we are going to show you how to Create a Solana NFT Staking completely Free, within 5 minutes and without Coding anything.
If you prefer the videos, we have you covered:
BENEFITS OF CREATING A SOLANA STAKING
Almost every project has a Staking System. There is a clear Reason behind this: It’s useful.
You are making your holders lock their NFTs, so they are not available on the market, and that’s positive for the Floor Price. In the meantime, you are providing them any sort of Utility or reward giving them a Token (if you don’t have a Token yet, here we show you how to create it).
We can conclude these Benefits of Creating an NFT Staking on Solana:
- Must-Have for an NFT Project
- Reward Holders
- Lock NFTs
- Supply available on the Market Decrease
HOW TO CREATE NFT STAKING ON SOLANA
Usually, you would need a Developer to create a Staking, but in this case, we will use a Free No-Code Tool that allows us to create it. This tool is Staking Builder, created by Smithii.
Let’s start directly with the Step-by-Step.
CREATE STAKING ACCOUNT
For starting we should go to https://stake.smithii.io and select a plan on Pricing. For this tutorial, we will use the Free Plan.
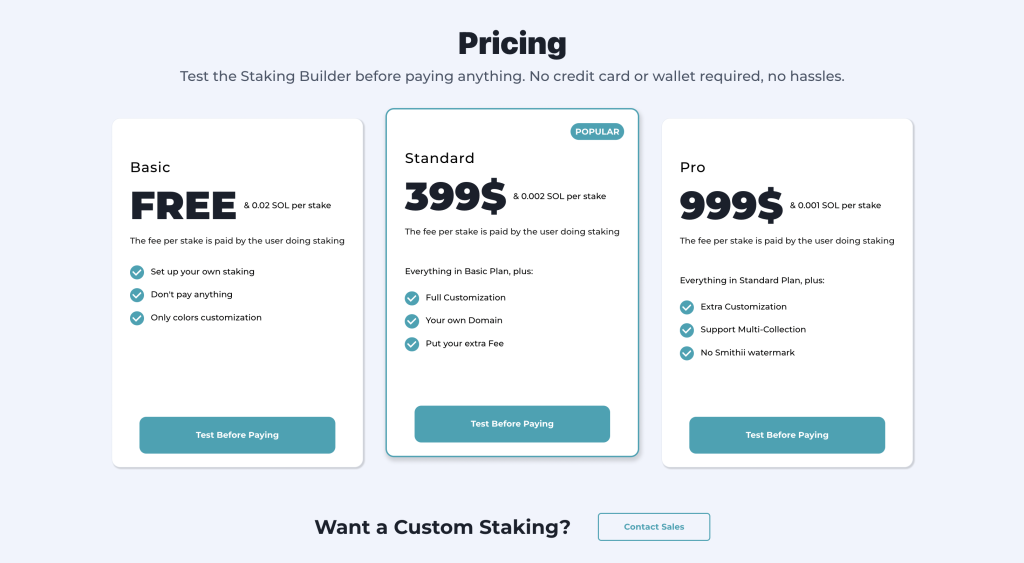
The Premium Plans give you more options to Customize, like setting your own Logo or deleting the watermark.
Also, there is a Fee per Stake for the User, on Free Plan it’s 0.02 SOL, and it decrease with the Premium Plans.
If you are just starting I personally recommend you to use the Free Plan and upgrade if you like the Tool.
With all this said we can go to onboarding (click on test for free button or go to https://staking.smithii.io/onboarding).
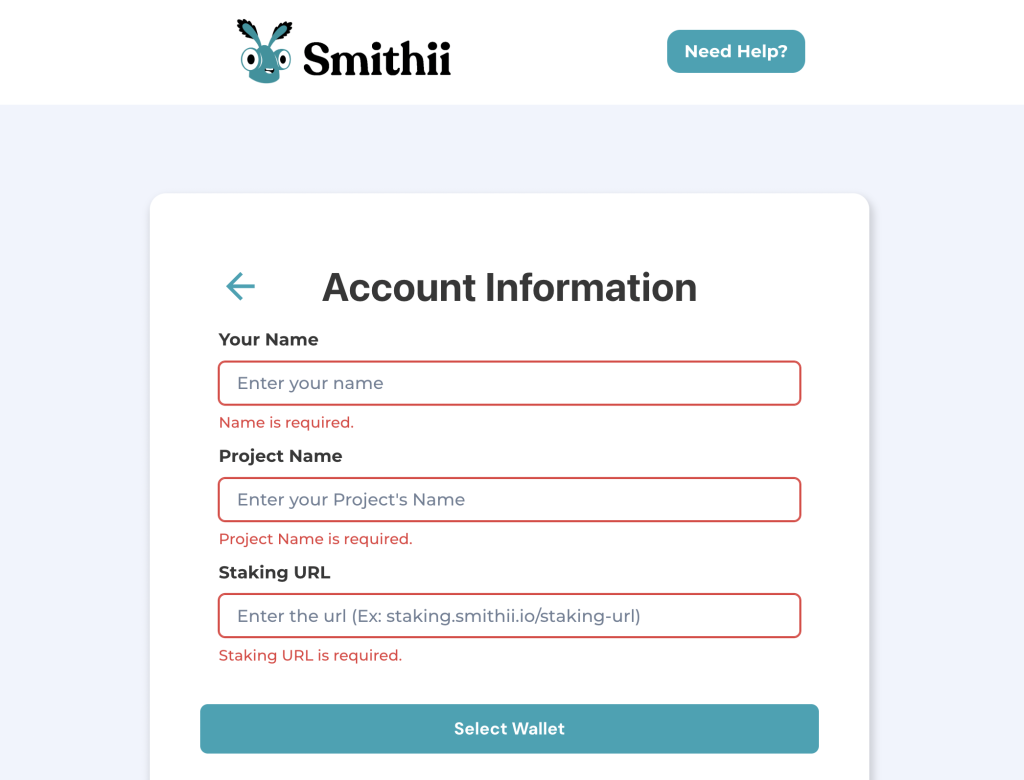
In this step, we will put our Project Information: Email, Name, Project Name and Staking URL.
STAKING PREVIEW
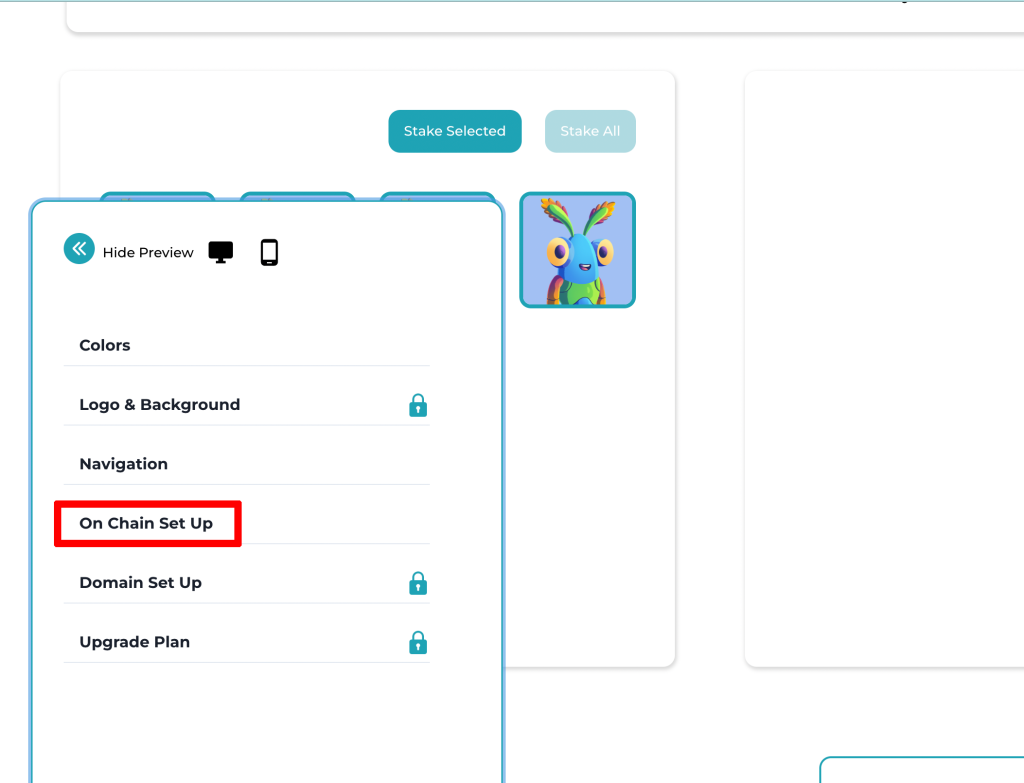
In the next step, we will see a preview of how the Staking Looks like, we will be able to make all modifications later, but here we can play a bit with the colors.
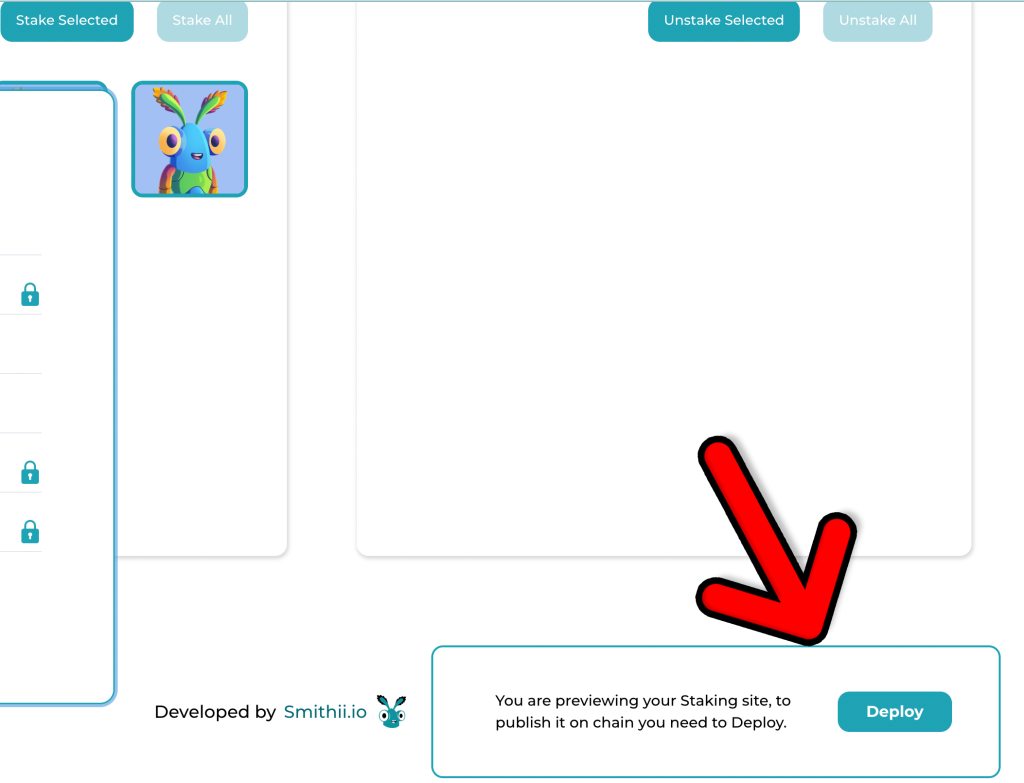
In order to continue we need to go to “On-Chain Set up”, Set our Collection Supply and then click on Deploy.
SOLANA STAKING DEPLOY
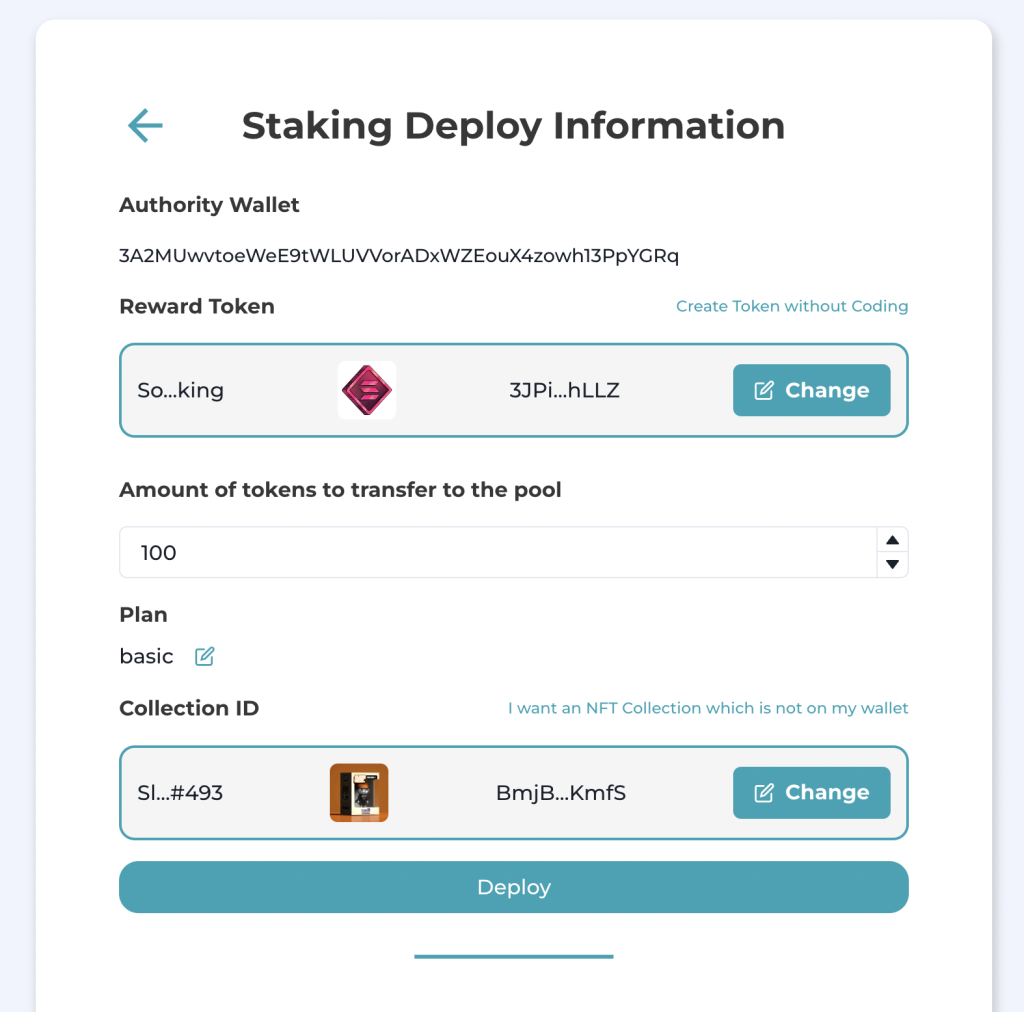
Now it’s time to set the last settings for our Staking and Deploy it on-chain. In this case, we just need to set the Reward Token (select how much tokens do you want to add on the Staking pool, you will be able to add more later) and the NFT Collection that will have access to Stake (You can select one NFT on your Wallet or introduce the Creator Address).
To finish Deployment we click on Continue and Deploy buttons. It will open a transaction for sending the Reward Tokens to the pool.
CUSTOMIZE STAKING
Now we have our Staking and our Holders are able to Stake, but before we should customize our UI and Rewards.
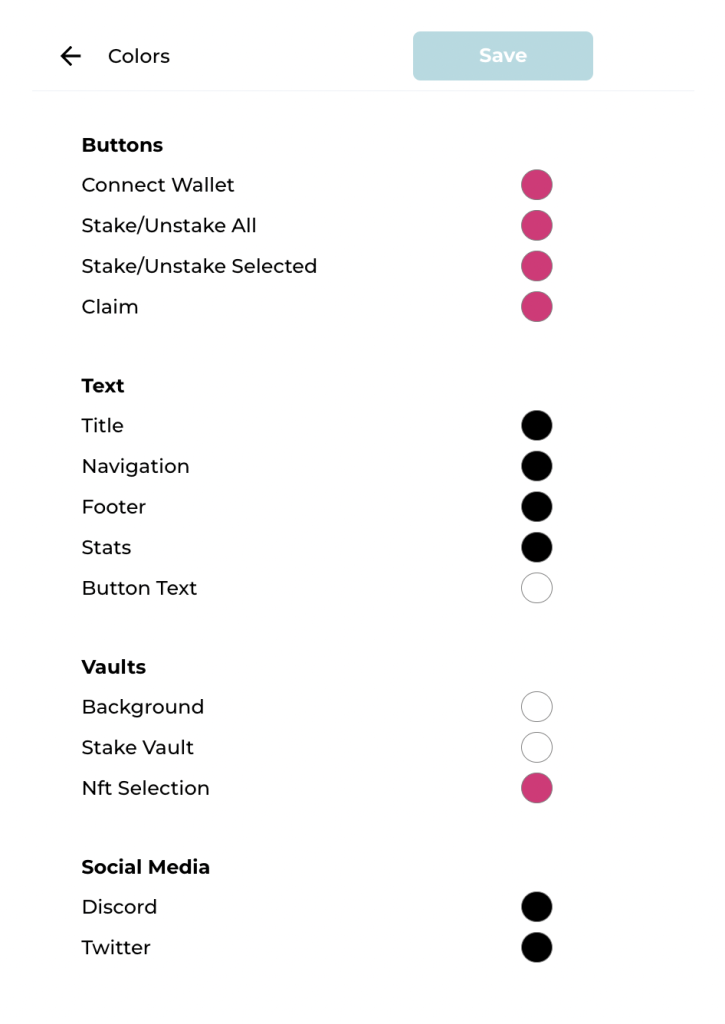
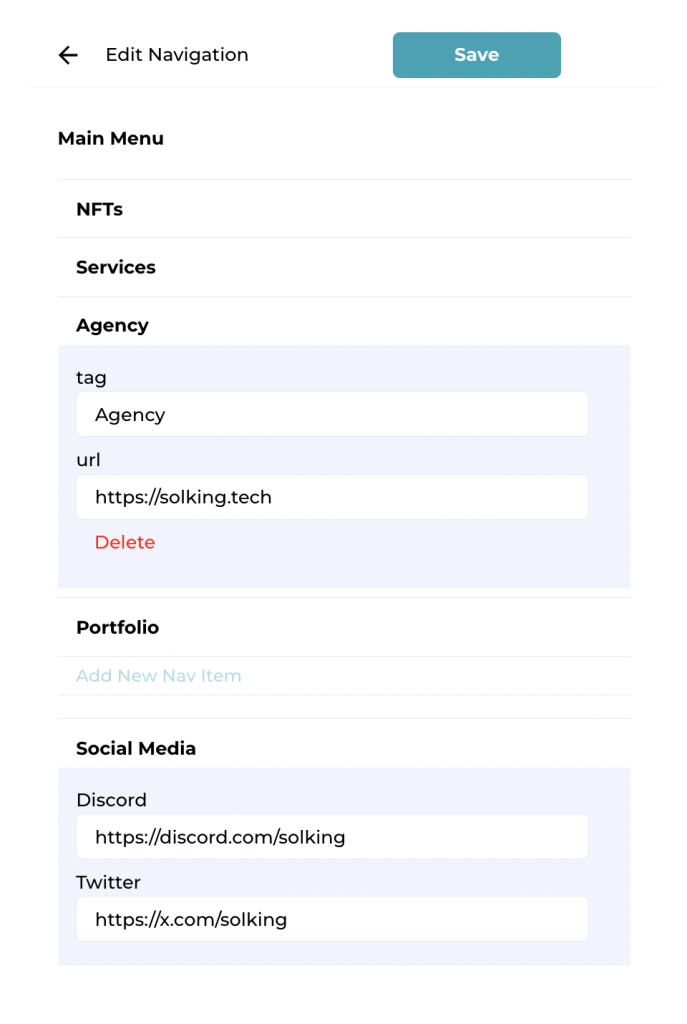
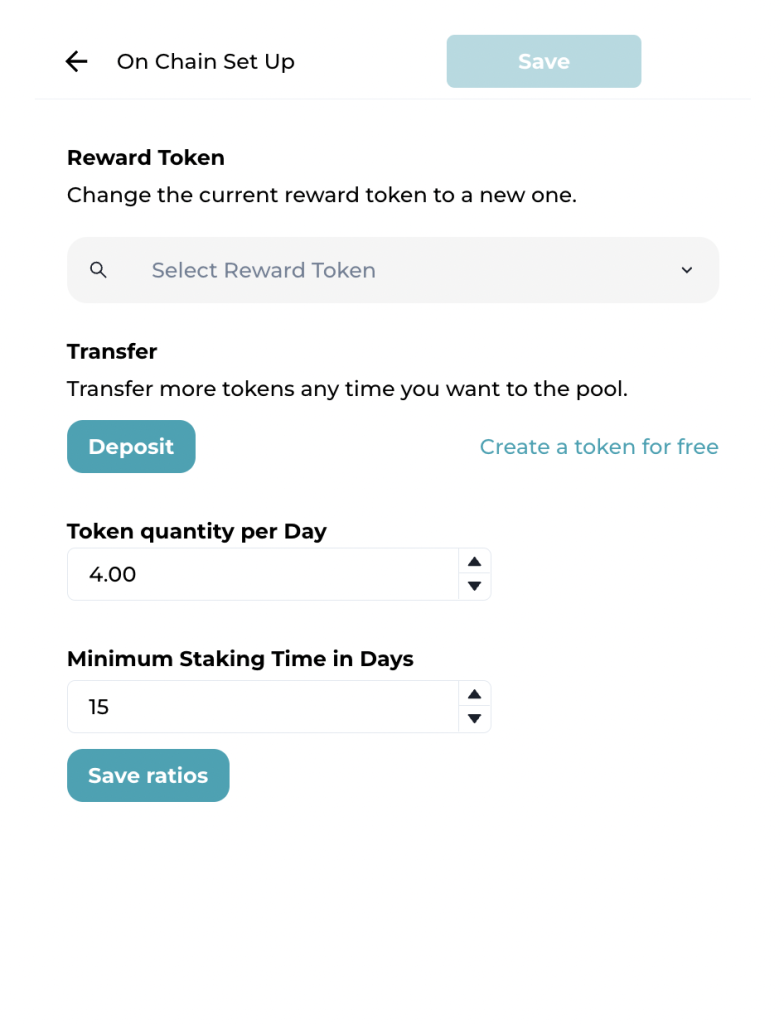
With the Free Plan, we can Customize the UI Colors, Navigation and the On-Chain Set up.
CREATE SOLANA NFT STAKING
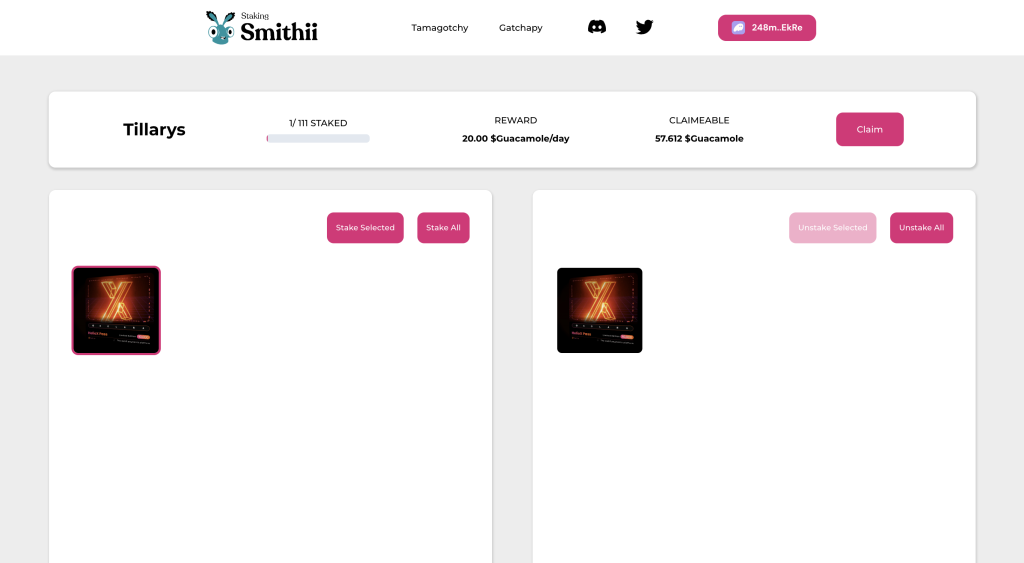
After all these steps we have our Staking Ready. It’s time to share it with your Community and provide value to holders. Let me show you how my new Staking looks.
How does yours look like?
